Task light
A Bauhaus inspired desk lamp with a unique wiring architecture.
Problem:
A friend of mine, named Genta, was looking for a new task lamp for his desk; I offered to design one for him! Genta is a big fan of the Bauhaus design style and was looking for a lamp that was highly functional and adjustable yet also visually coherent with the style and with some sort of unique feature to set it apart.
Objective:
To brainstorm, conceptualise, design and produce a task light that is:
– Adjustable for positioning the light precisely.
– Bright enough to allow for focused desk use.
– Inspired by the Bauhaus style: linear and geometrical shapes with a general minimalism / simplicity about it; easy to mass produce with a clever use of resources; adopting the “form follows function” approach.
– Unique from existing products on the market.
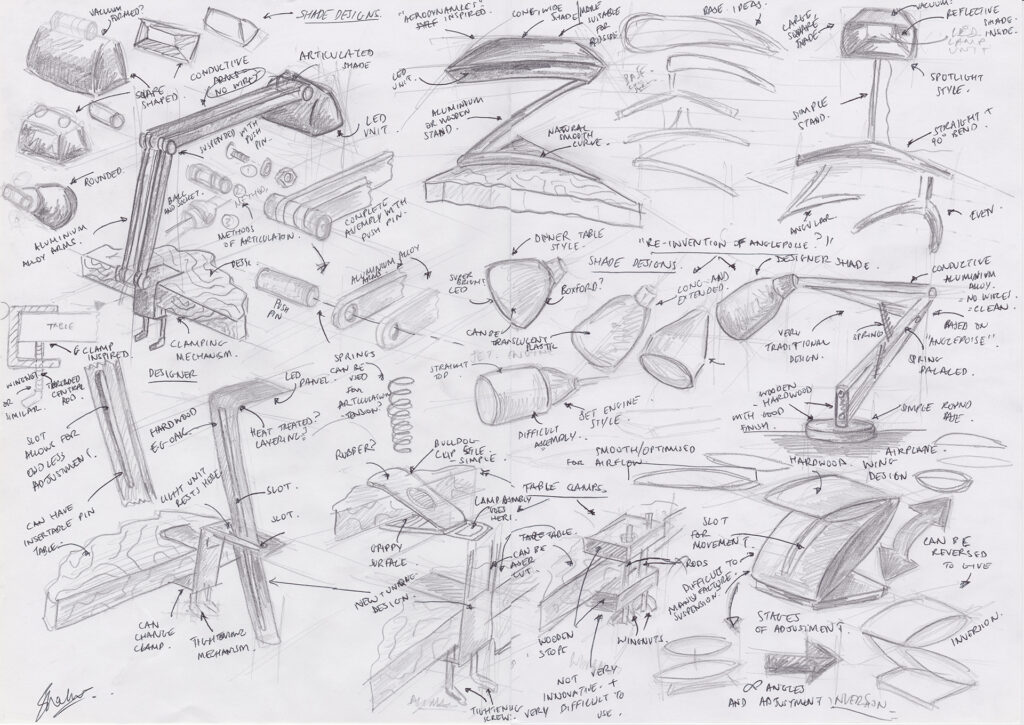
To begin with, I sketched my initial thoughts out. The straight lines and geometrical / symmetrical shapes from the Bauhaus style immediately struck me and I explored some concepts that followed this idea. I brainstormed regular shaped arms and shades; ones where you would look at the product and immediately know what it does. Following on from this, I sketched 12 of the concepts in more detail, with potential features labelled and picked out. I was also looking at the famous Anglepoise lamps to see how their adjustability could be incorporated, such as through magnetic ball joints, spring loaded hinges or simply through pivoting parts.

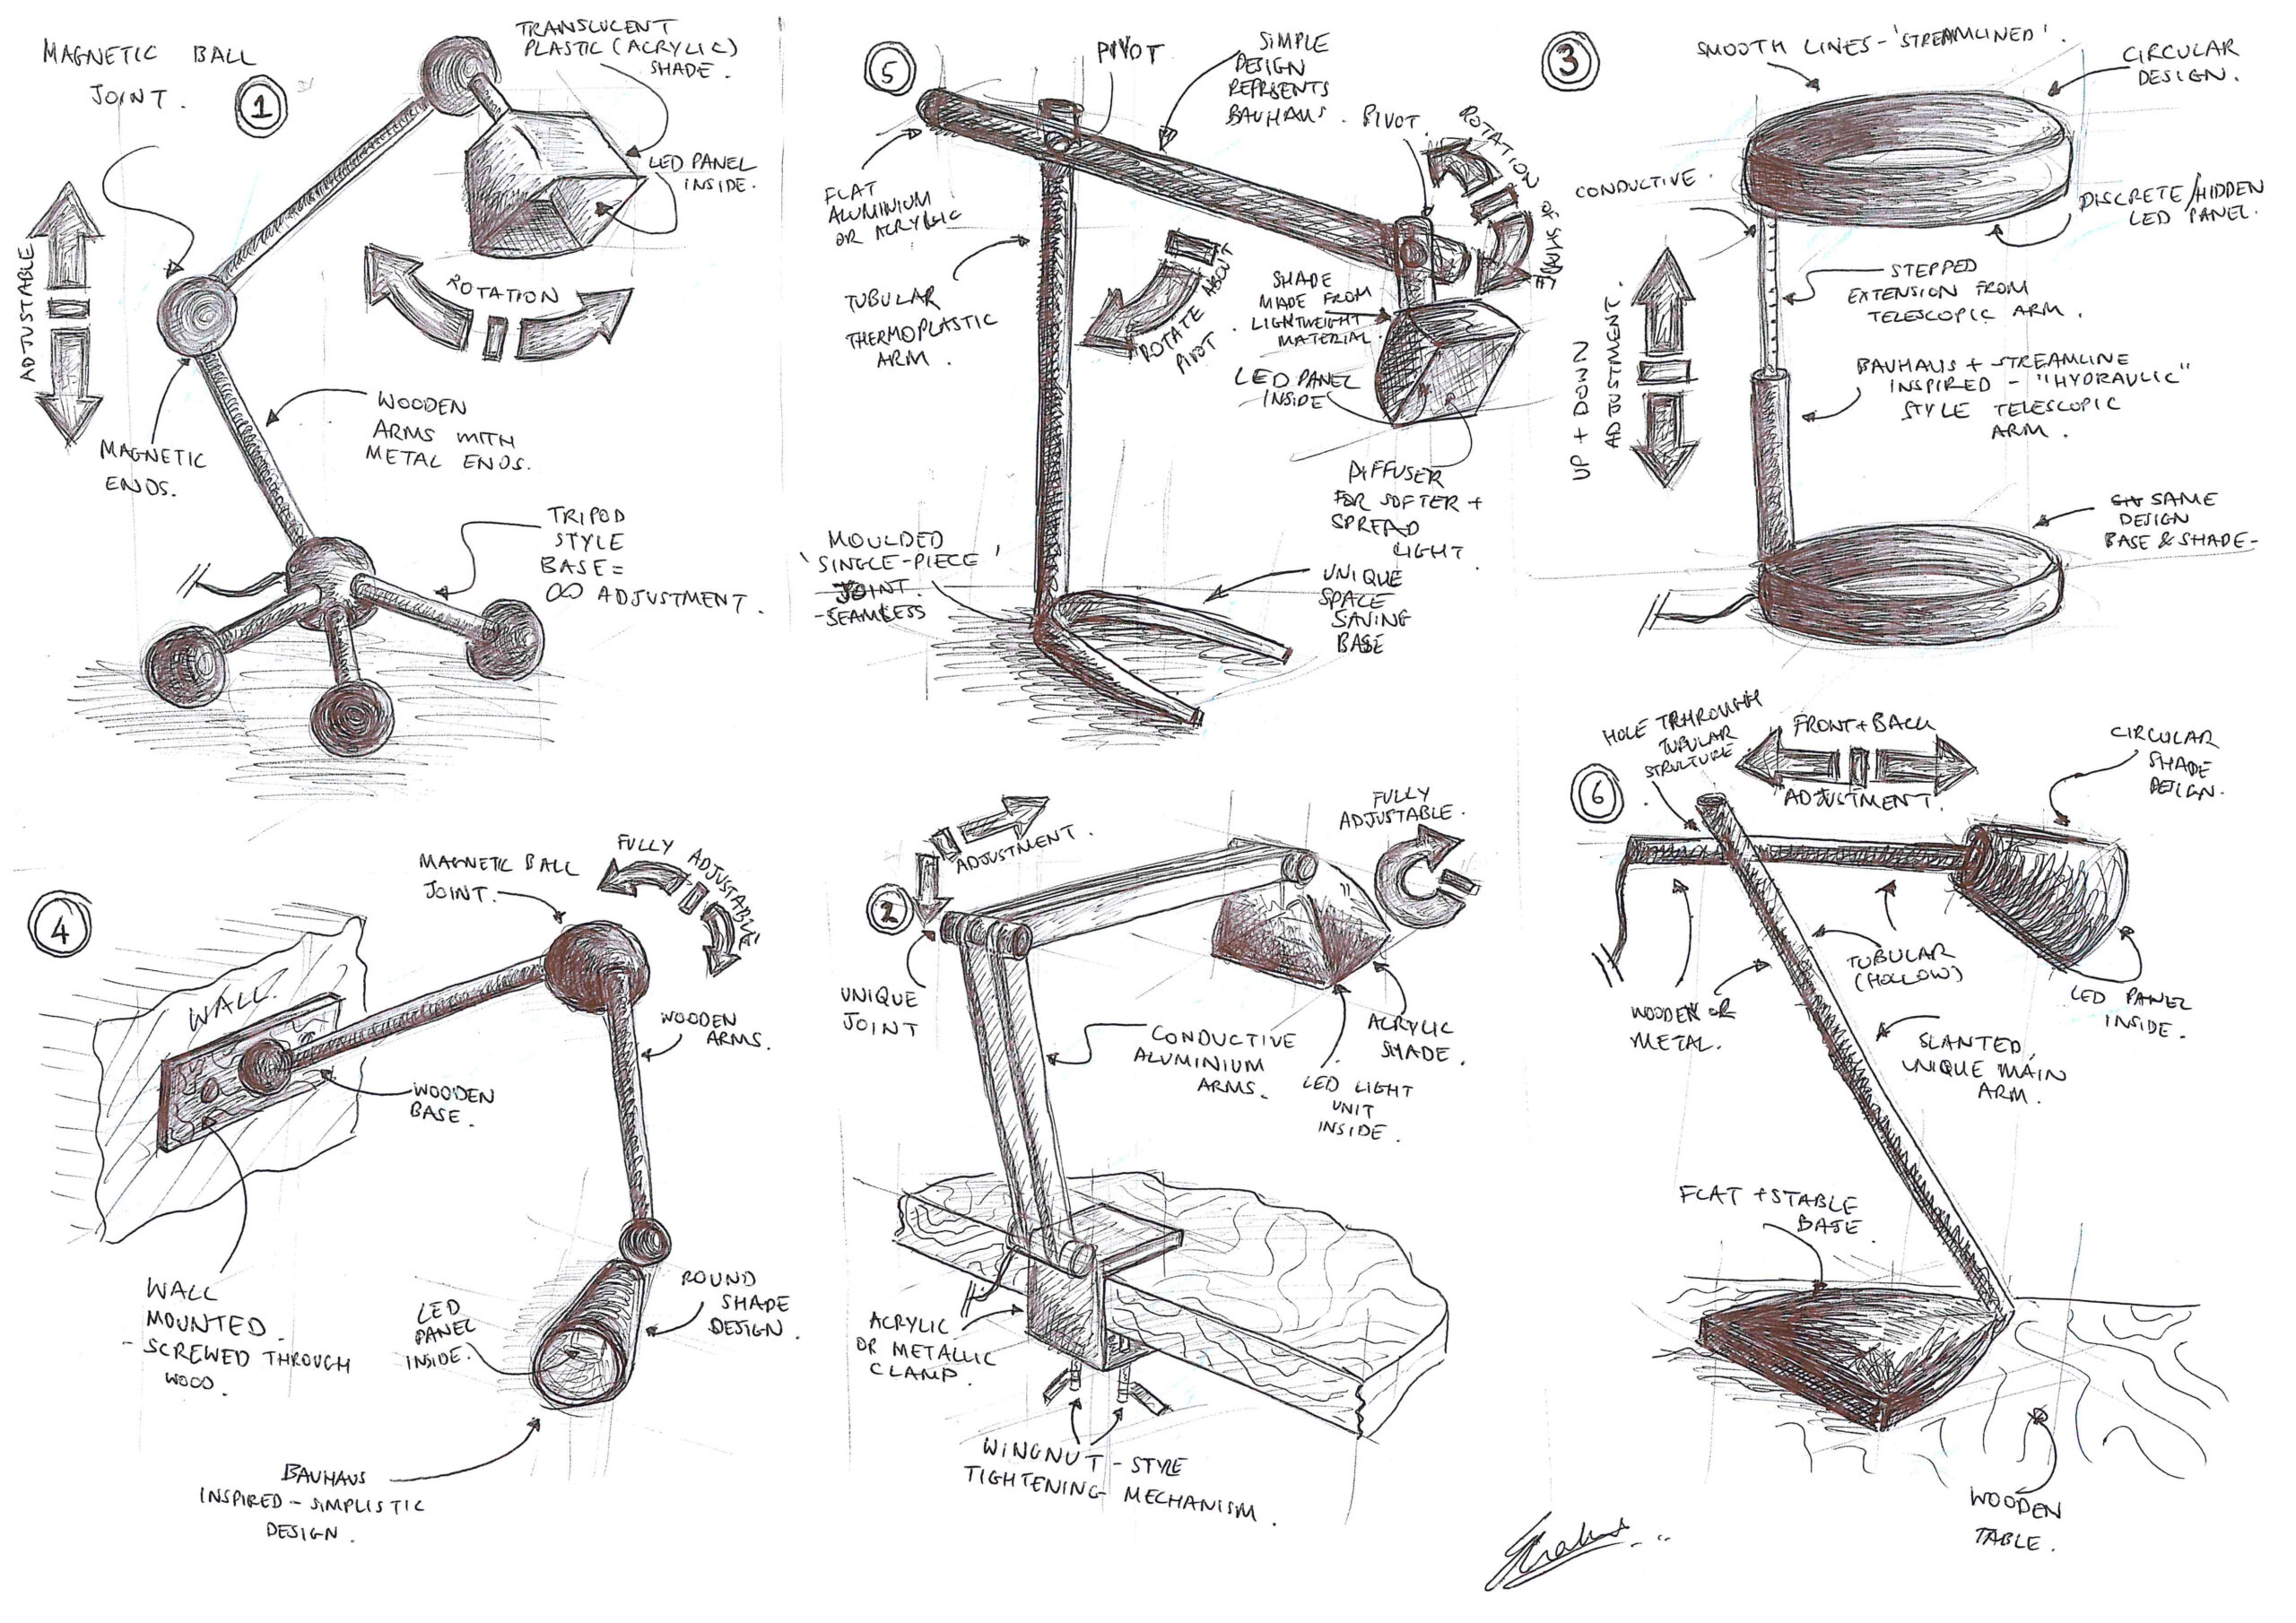

After speaking with Genta, and showing some initial proposals of ideas, he was able to pick out his favourites from the 12 concepts. I then sketched these in more detail to define features in more depth.
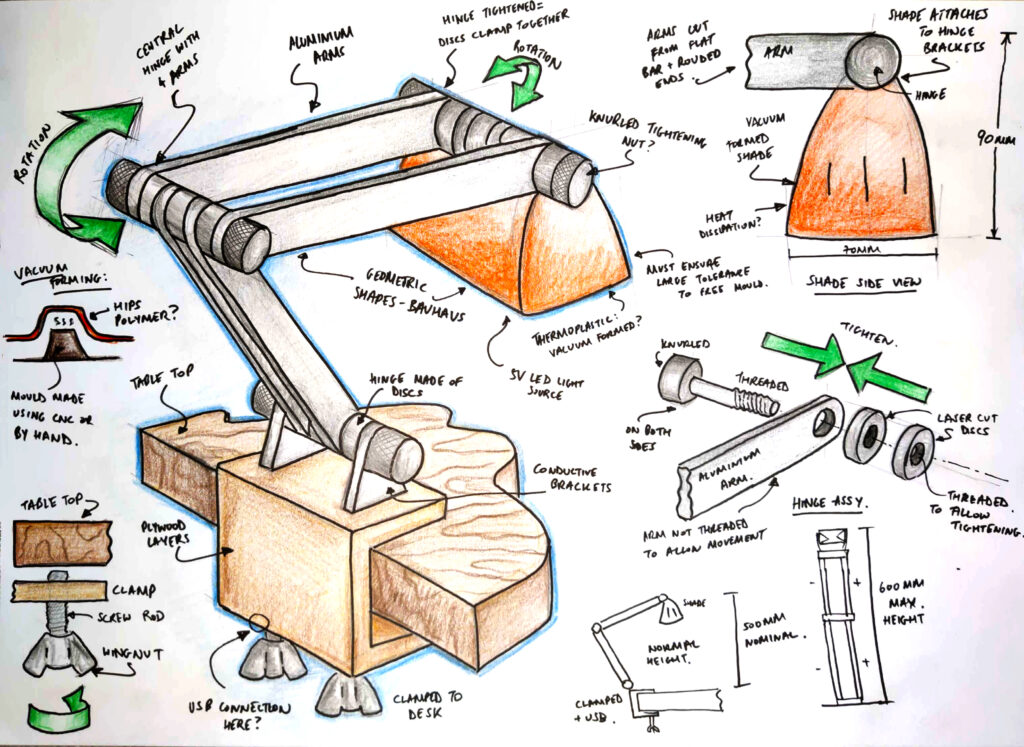
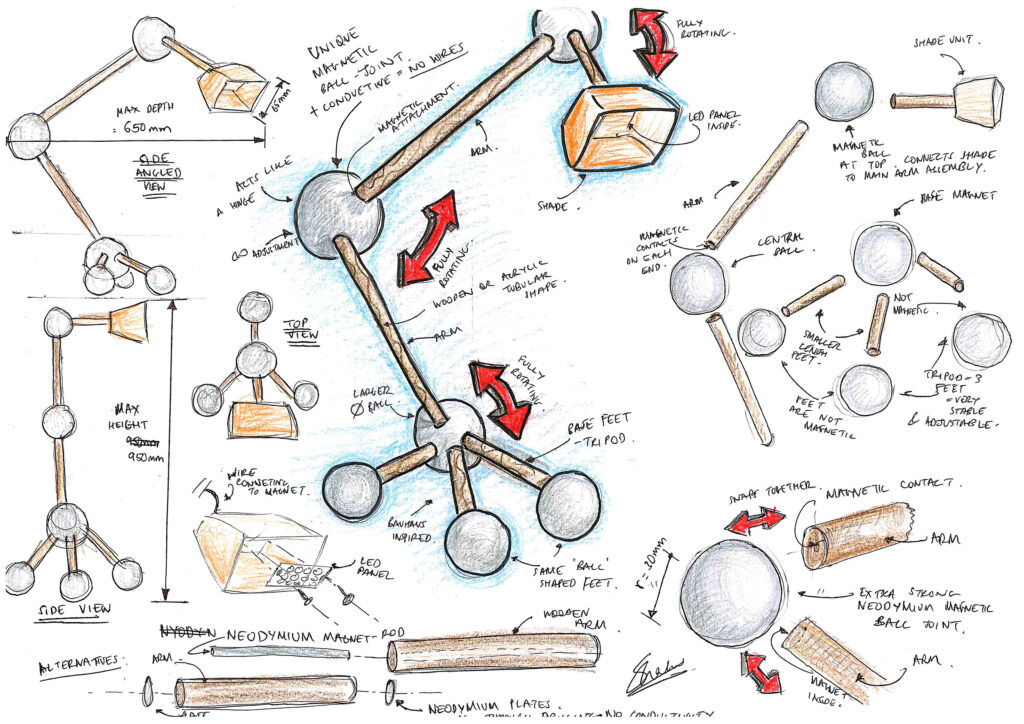
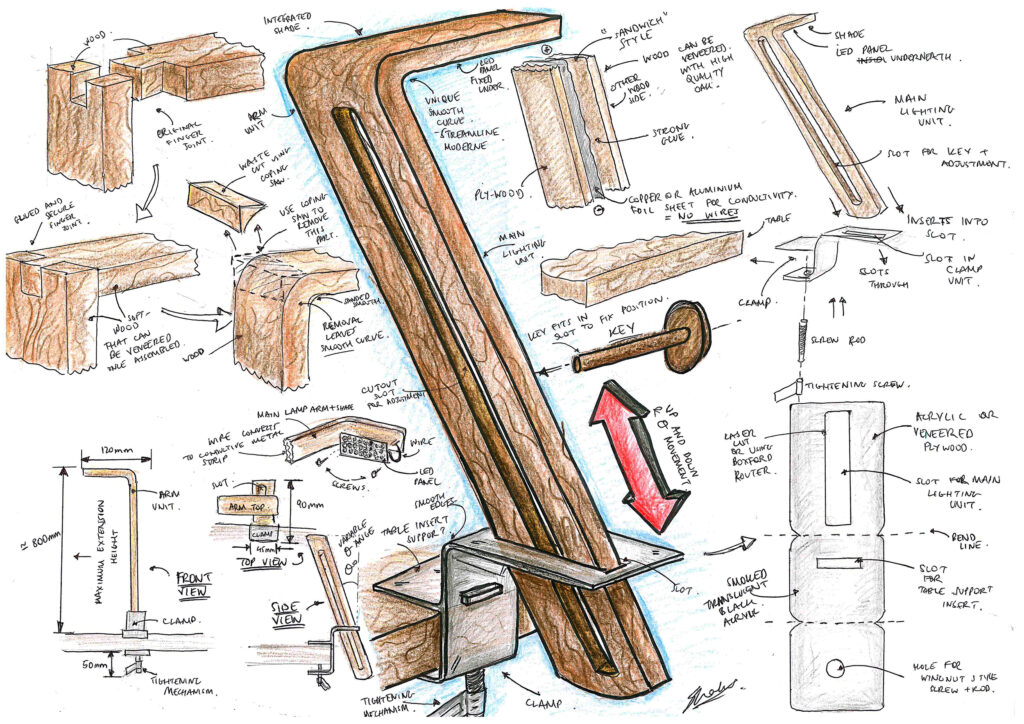
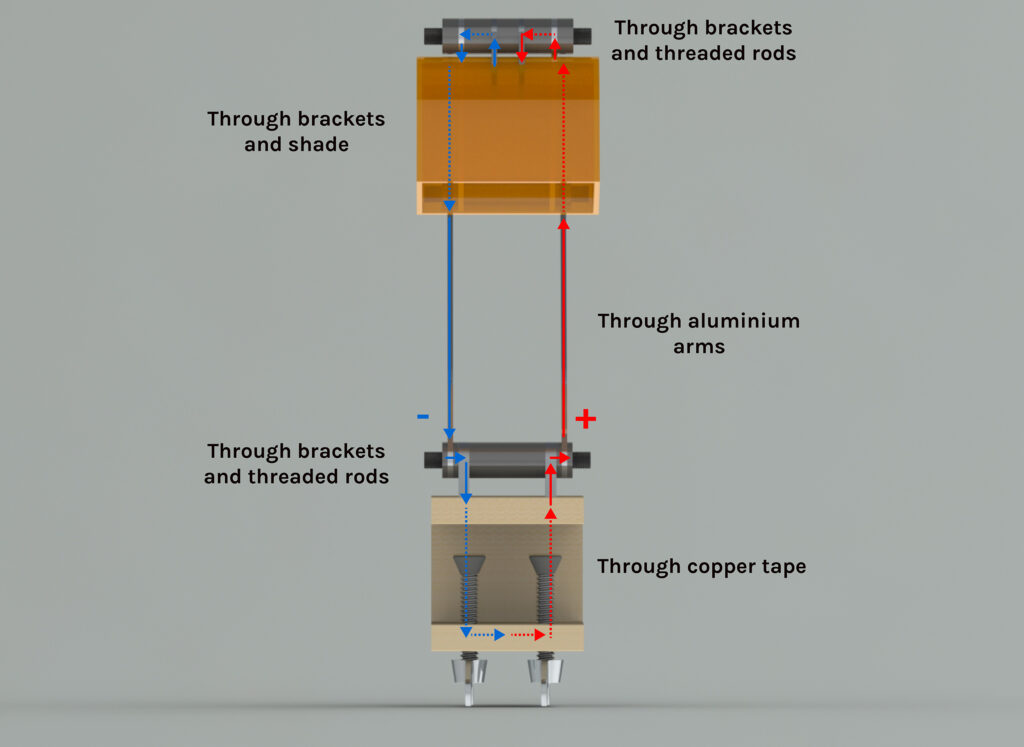
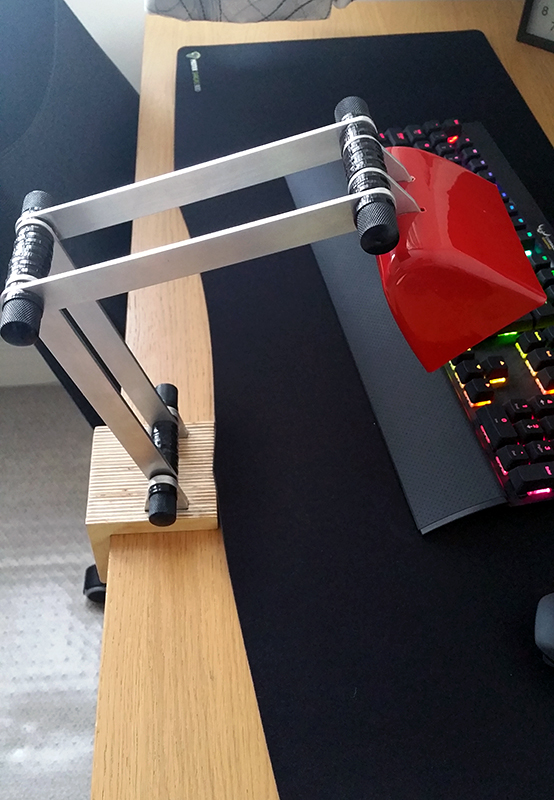
At this stage it was clear that Genta was really keen on a unique feature of the first concept above; hidden wires. This excited me too! I decided to explore the design of this in depth and formulated a potential architecture. As I planned to use a low voltage LED light source, I figured that the arms could act as both a structural and conductive part. Hence, aluminium arms were chosen. The hinges needed to allow the arms to conduct but also enable motion of the lamp. Thus, I came up with the idea of a hinge made of a central threaded aluminium bar (connecting the arms), with plastic laser cut discs to form the outer design. A knurled nut could be used to tighten onto the bar and simultaneously squeeze the plastic disks together, keeping the arms in position. After proposing the diagram below to Genta, he was sold on the idea too!
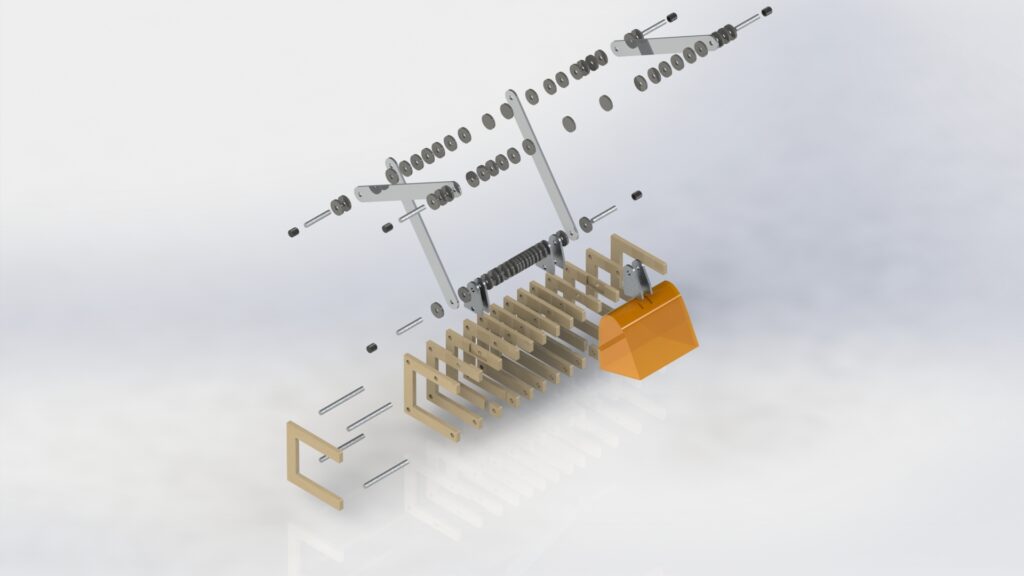
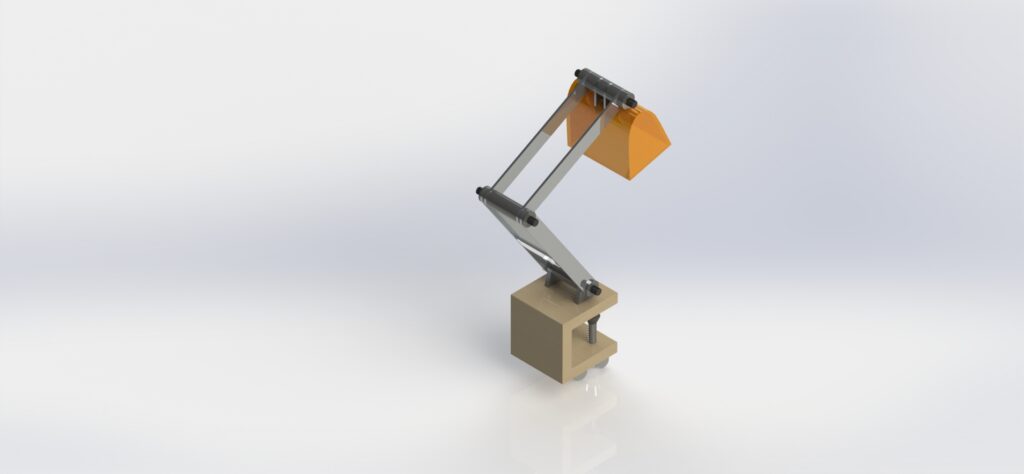
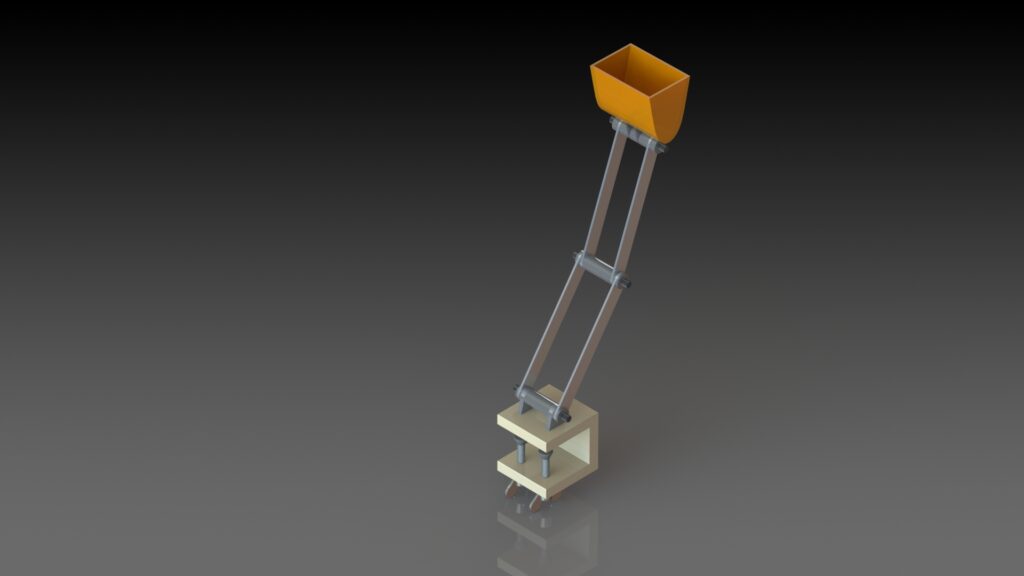
I continued the design process by developing an accurate CAD model (in Solidworks) and rendering some images to show Genta.
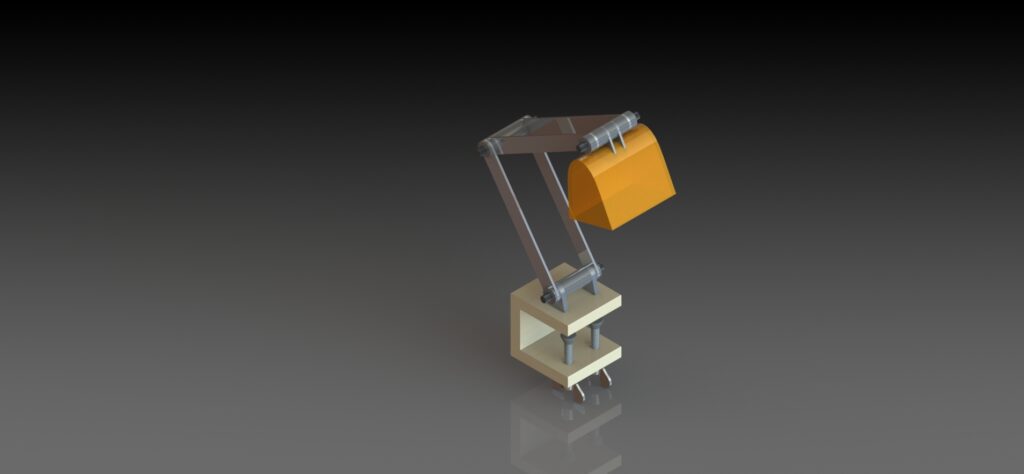
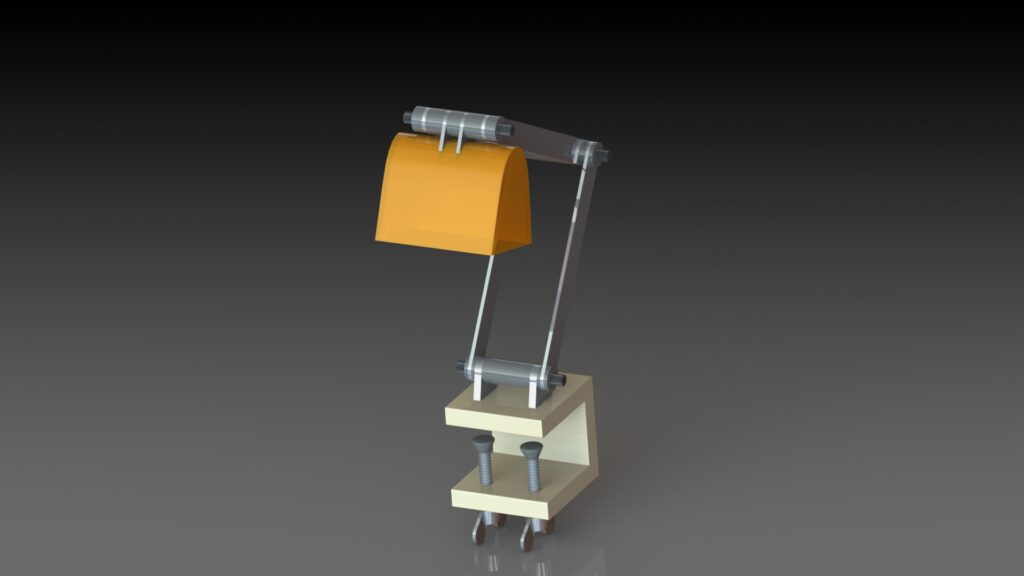
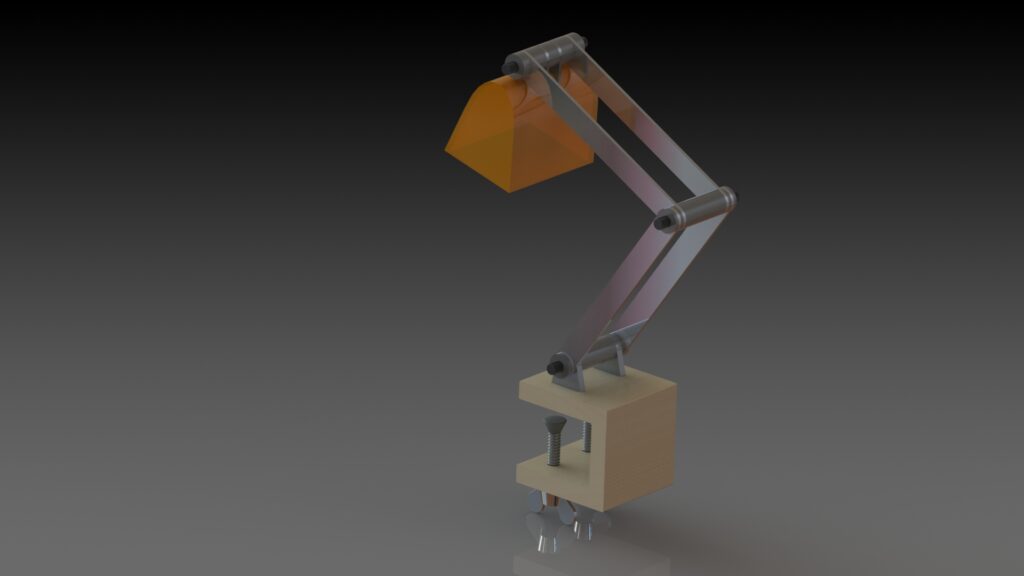
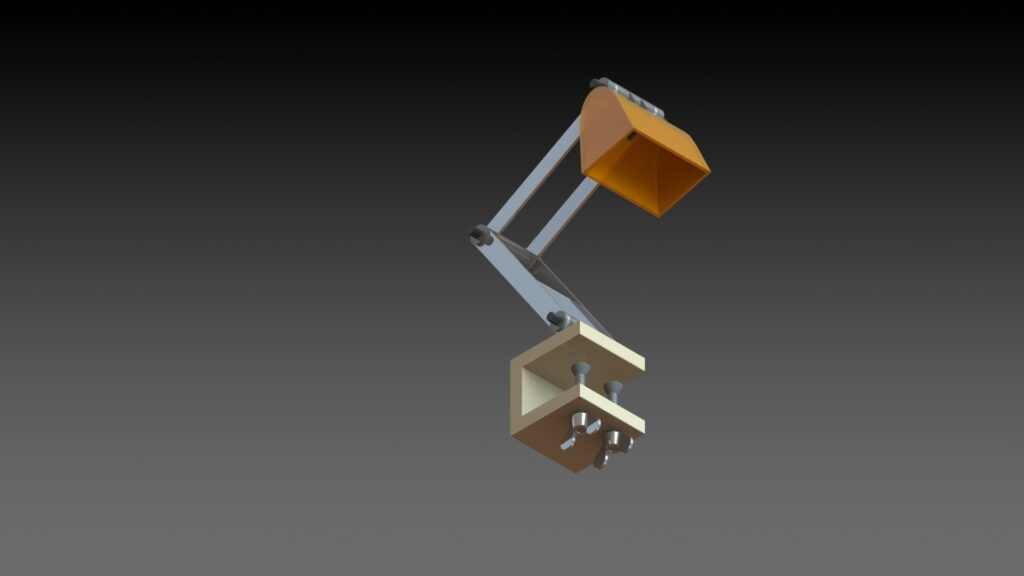

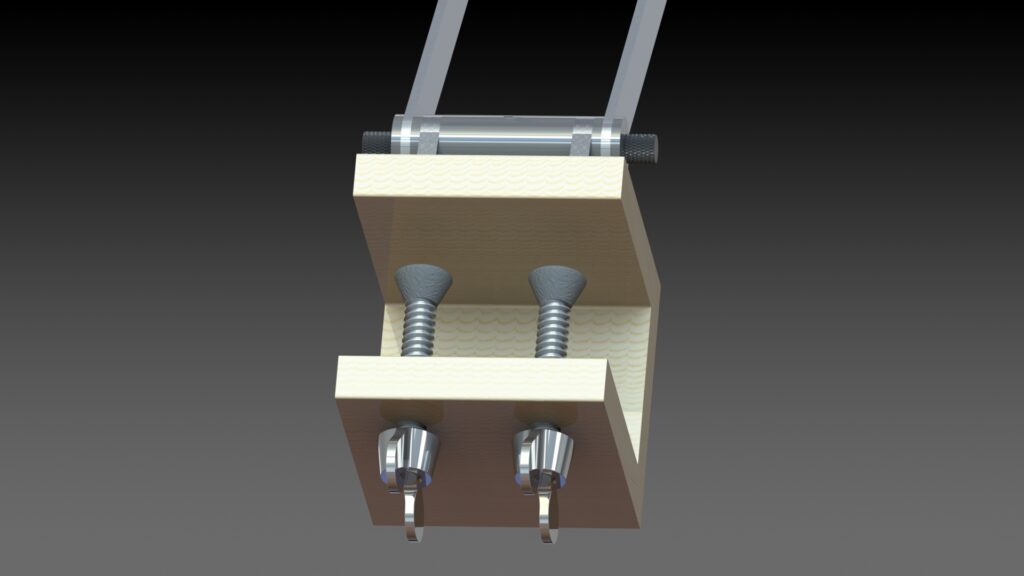
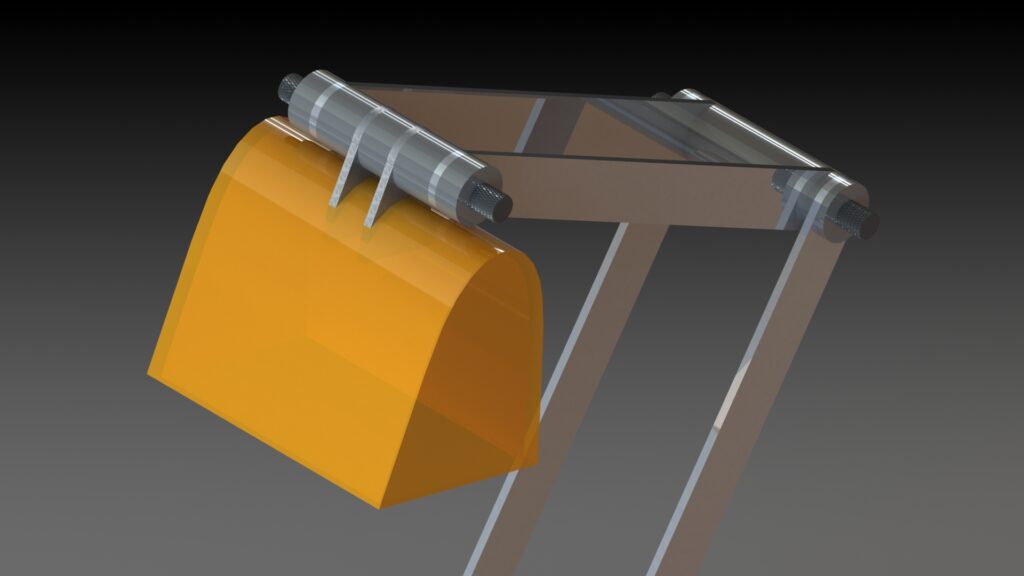
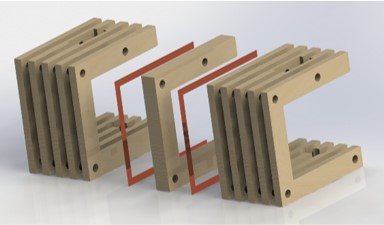
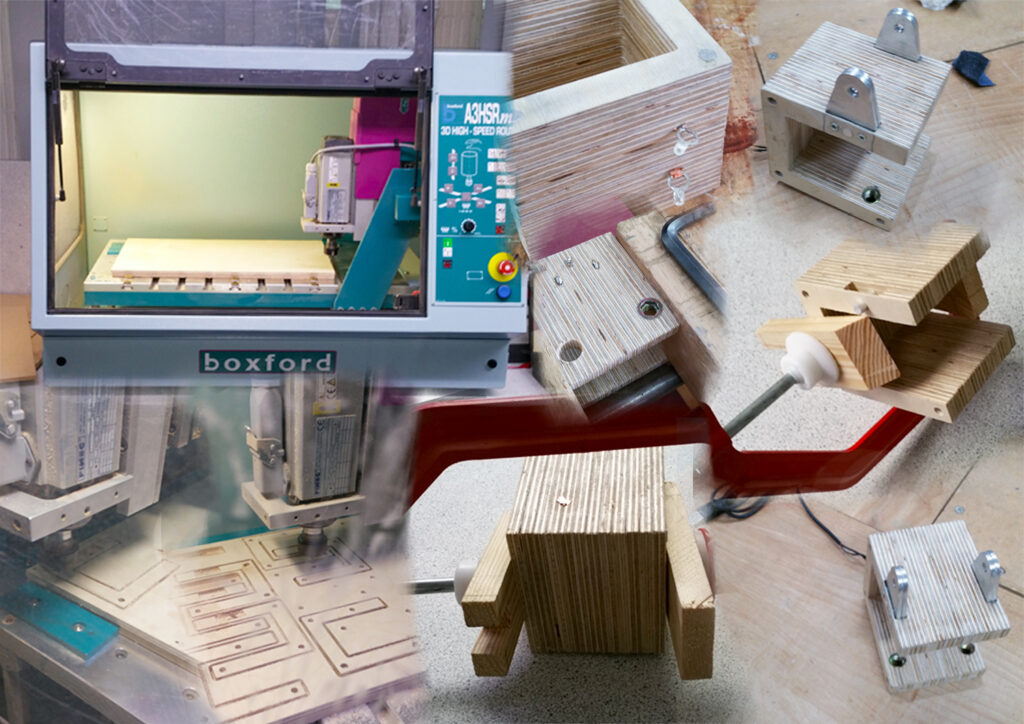
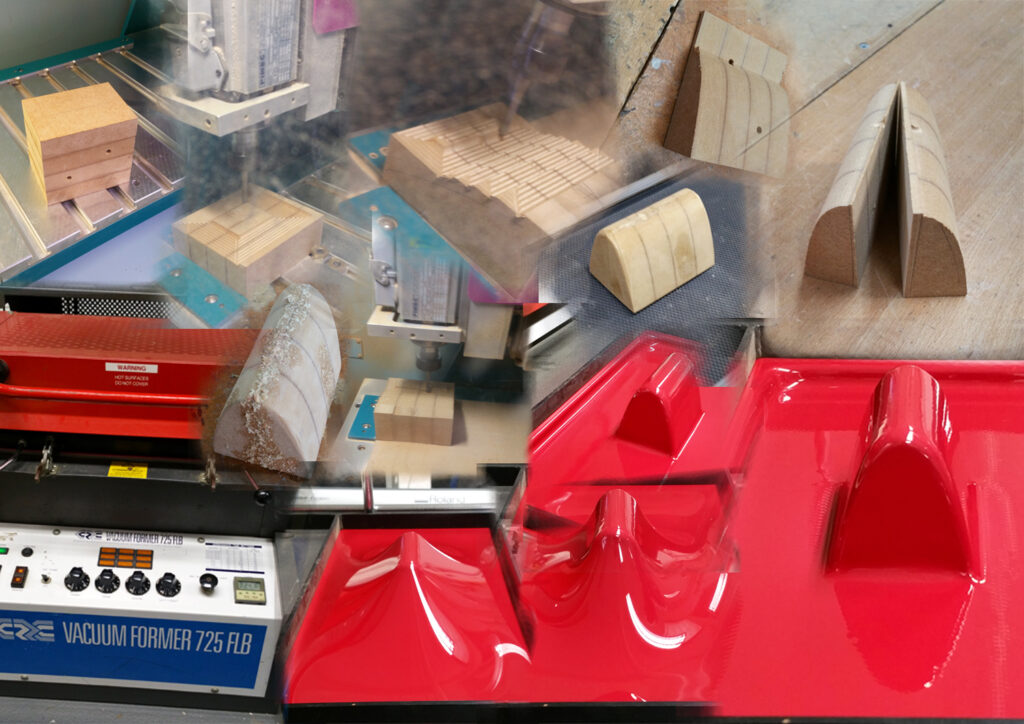
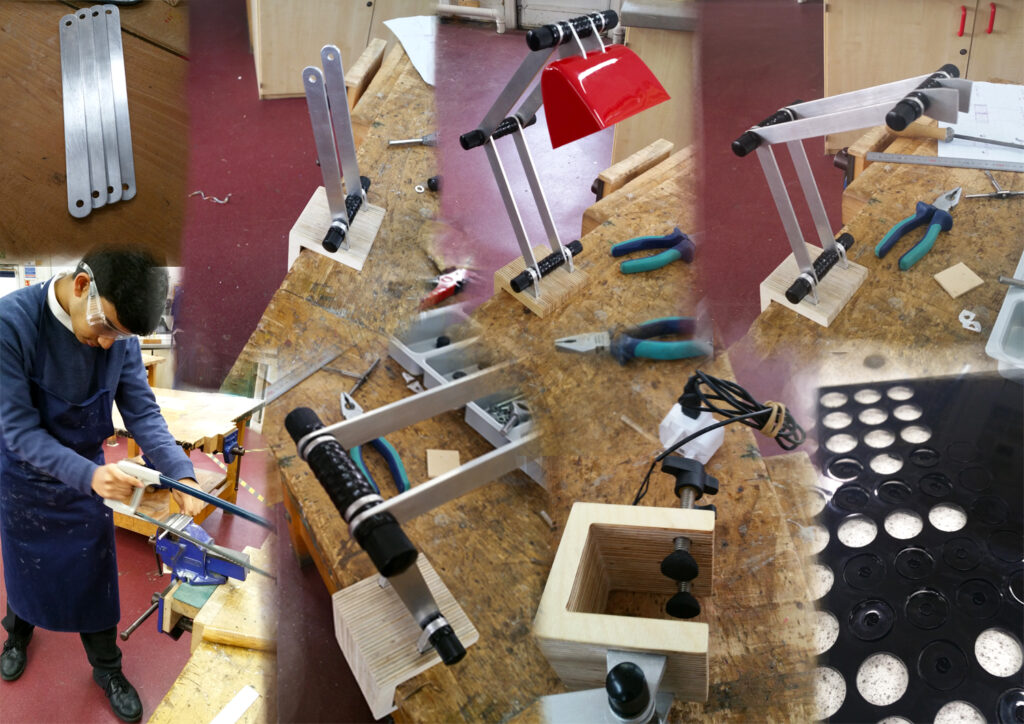
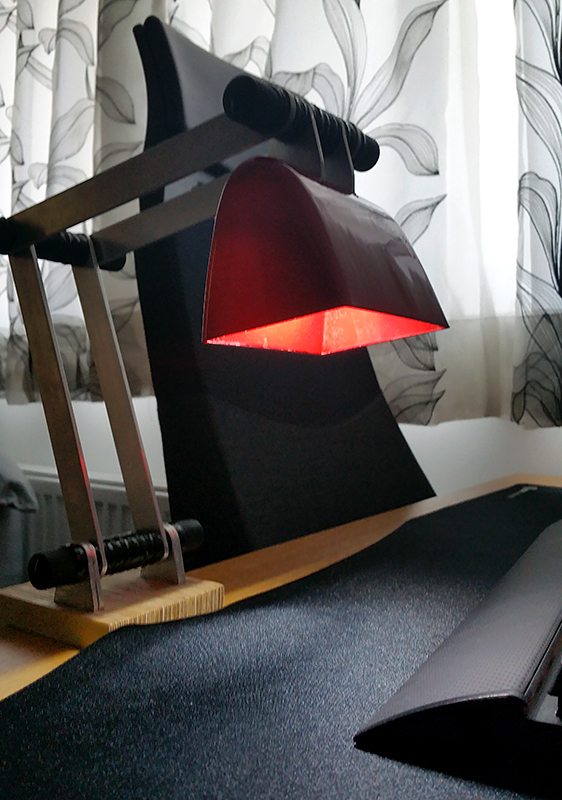
After finalising the CAD model, the manufacture process began. One of the characteristics of the Bauhaus design is the considerate / smart use of resources. My manufacturing process followed this closely. First, the base was produced using repeated ‘C’ shaped sections cut from 9mm plywood using a CNC router. A copper wire was sandwiched between the layers to allow power to the light source through the arms as above. After adding in the brackets and threaded inserts for a desk clamp, the layers were glued together. Next, the shade was manufactured using vacuum forming to achieve a single piece, smooth shape. HIPS was used for vacuum forming though it required a mould prior to setup. Again, the mould was cut from MDF using the CNC router (in halves), then glued, filled and sanded smooth. I had to pay attention to details such as adding radii to edges to enable the mould to come out of the vacuum form in the end! Lastly, the arms were cut from aluminium bar, discs using a laser cutter and a guitar tuner was used as the knurled tightening nut. The lamp could then be assembled together.
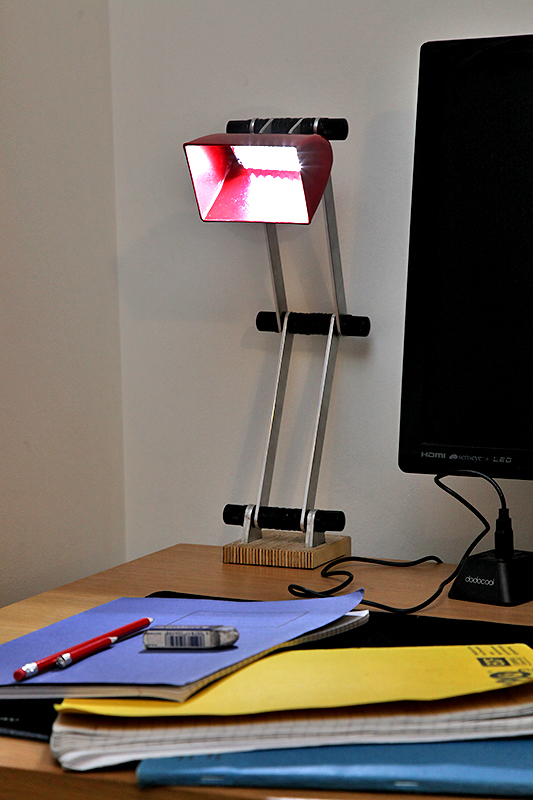
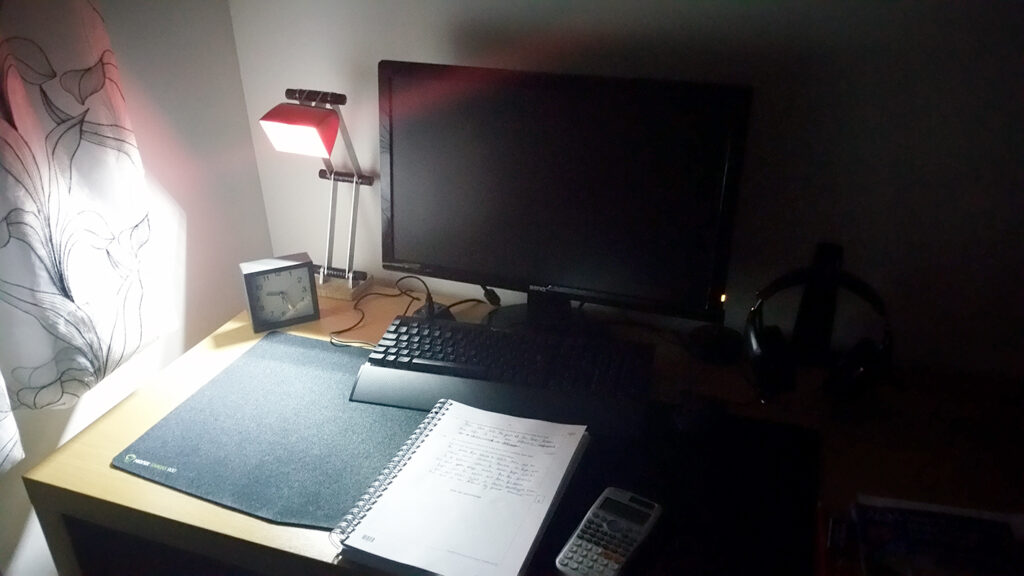
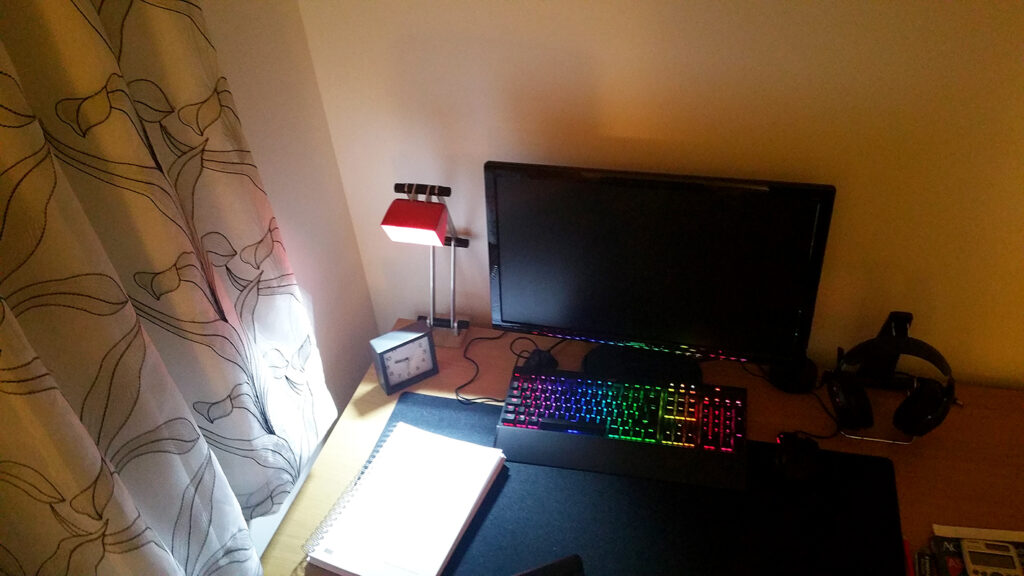
Finally, it was complete and could be tested! As promised, the lamp carries the low voltage current through the base, hinges and arms with no visible wires. Genta was extremely pleased with the light output and ease of adjustment from the final product.

Reflection:
I was extremely satisfied with the final product and more importantly, so was Genta. He agreed that it represented the Bauhaus style well, had a bright output with low power consumption due to the use of LEDs, was highly adjustable and stood out from the market for the novel wiring architecture.
If I was to do this project again, there may however be a few things I might think of changing:
– Increasing the capacity of the clamp to allow for thicker desks. The current design has a maximum of 40mm for this which may not be suitable for all desk types.
– Using a thermocolour pigmented polymer in the vacuum forming process. This would then mean that as the lamp heats up, the colour of the shade would change, providing a unconventional appearance.
– Use of a threaded insert for the acrylic laser cut discs. Currently, the hinges are quite fragile and are easily cross threaded especially given the soft acrylic thermoplastic. Using threaded inserts will prolong the life and durability of the hinge design.
– Self tightening hinge design: by using a lock washer and gluing some of the hinge discs together, it could mean that each hinge only has one knurled tightening screw rather than two. Currently, having to tighten both sides of the hinge barrel can be a little cumbersome, so simplifying this mechanism would provide a huge improvement to the user experience.
Skills developed:
Idea sketching, concepting, human-centered design process, CAD modelling (Solidworks), CAM techniques (laser cutting and CNC routing) and manufacture using various hand tools.